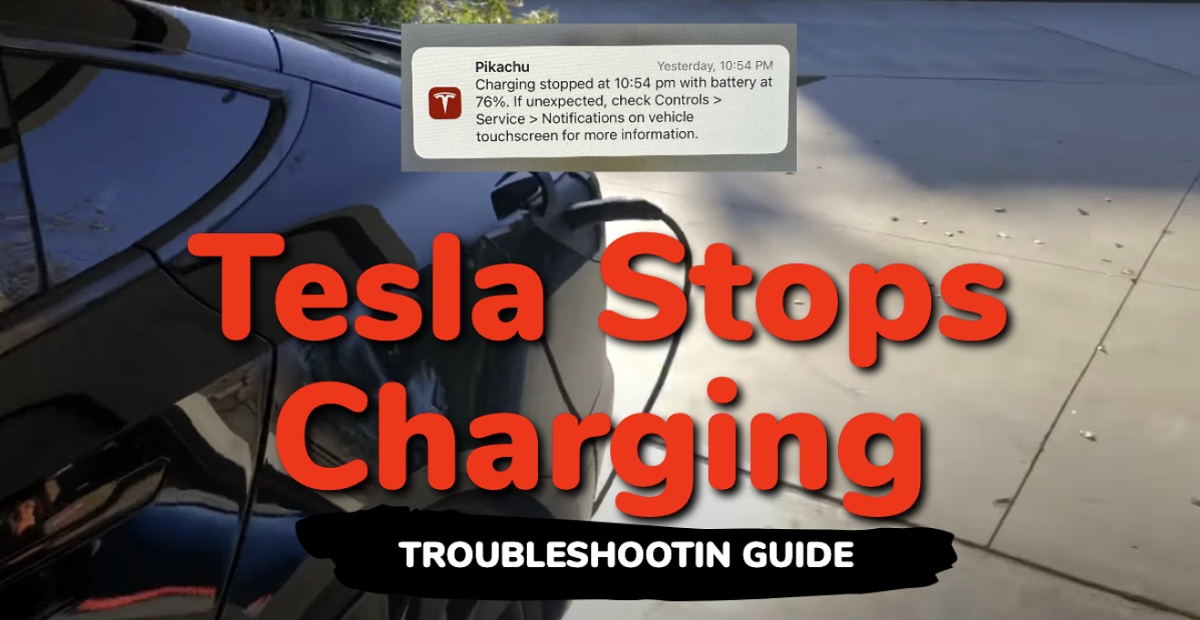
Experiencing a Tesla that stops charging after a few minutes can be quite frustrating. But don’t worry, you’re not alone in this.
There are a few common reasons that could be causing your Tesla to stop charging unexpectedly, all of which will be looked into on this page. These factors cut across the charging equipment, the car itself (software and hardware), electrical issues and environmental conditions.
More important, I will show you some proven ways to fix the issue and get your Tesla back to charging efficiently.
Let’s dive right in!
Contents
Why Does My Tesla Stop Charging After a Few Minutes?
Below are some of the most common reasons why Tesla stops
- Outdated Charging Software: Your charging software could be out of date, causing communication issues between your Tesla and the external charging equipment. Some versions of the Tesla wall connector firmware have also been associated with causing Tesla to stop charging unexpectedly.
- Charging Port Issues: Problems with the charging port can cause charging errors. Inspect your charging port for any debris, dirt, corrosion, object blocking the port or any damage that might prevent proper charging. If the port is blocked and the charger is not well in contact with the car’s charging port, it can cause the Tesla to stop charging before limit.
- Fault Charging Cable or Connector: If your Tesla charging cable or connector is faulty, it can also cause your Tesla to stop charging after a few minutes. If you are using a public charger, try you may want to move to a different station and try a different charger.
- Faulty Battery: If your Tesla battery is faulty, it can also cause the Tesla to stop charging.
- Battery Charger Limit: Charging your Tesla battery to 100% every time is easily one way to cause the battery capacity to reduce considerably very fast. One of the most effective ways to maintain the battery life is to avoid overcharging it by keeping it between 25% and 75% of charge. A lot of Tesla owners do this by setting a maximum charge limit. Once the Tesla reaches this limit (which might have also been changed by mistake to a lower value), the Tesla stops charging immediately.
- Third-Party App Features: Some third-party apps like Chargepoint and Optiwatt have features that can cause the charging process to be interrupted.
- Ambient Temperature: Charging is most effective in an ideal ambient temperature. Charging your Tesla indoors or in a well-ventilated area will help maintain an optimal environment for efficient charging. If the temperature rises above a certain level, the battery temperature management system will stop the charging to maintain the health of the battery.
- Electrical issues: Overvoltage or overcurrent can also cause Tesla to stop charging at home. Too low current or voltage can also cause the charging process to be disabled. A circuit breaker trip can also cause the charging to stop at home.
- Melted Fuse: A fuse is an electrical safety device that operates to provide overcurrent protection of an electrical circuit. When too much current flows through it, the metal wire or strip in it melts thereby stopping or interrupting the current which could potentially damage other important components.
- Charging Interruptions: Some charging errors might result from interruptions in the charging process. Ensure that your charging environment is stable and free of potential disturbances that could lead to charging interrupted messages.
With these in mind, let’s take a look at some proven ways to fix the issue.
Tesla Stops Charging: Troubleshooting Guide
Follow the step-by-step guide below to fix the issue.
1. Reset the Car System
Sometimes, a simple reboot of your vehicle’s system can resolve charging issues.
To reboot the system, you can follow these steps:
- Shift the car into park mode
- Press and hold both scroll wheels on the steering wheel for a few seconds until the screen turns black.
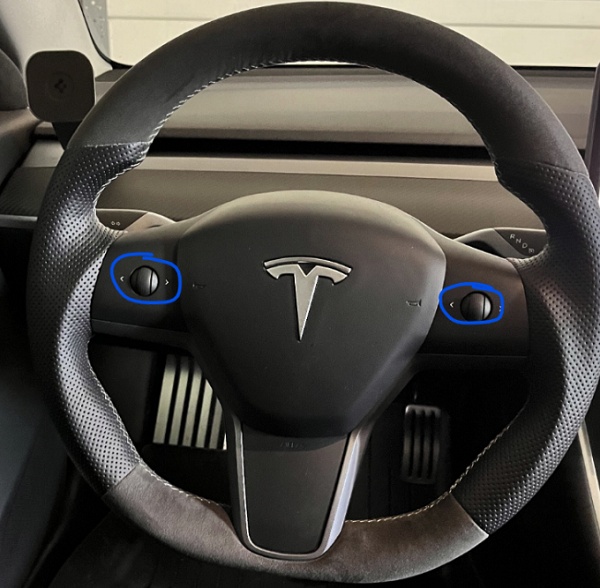
- Wait for the system to reboot, and then release the scroll wheels when the Tesla logo appears.
This is called a soft reboot.
If the issue persists, you can try a hard reboot. Here’s how to do that:
- Park your car and ensure it’s in ‘Park’ mode.
- On the center screen, tap on “Controls” > “Safety & Security” > “Power Off”
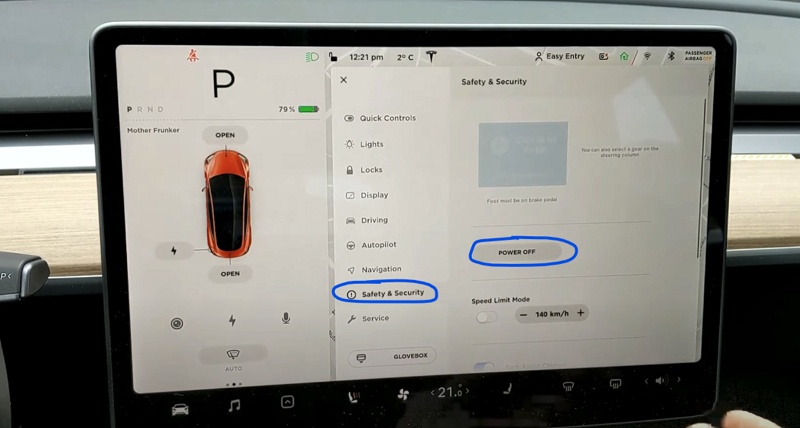
- The screen will turn off and the car will also power off. Then, wait for at least two minutes without interacting with the vehicle (i.e don’t open the door, press any of the pedals or touch the screen while waiting). This is to ensure that the car fully shuts down and that the hard reset is successful.
- After two minutes, press the brake pedal or open the door to wake the vehicle
If your Tesla stopped charging because of some software bugs, this should fix the issue for you. Otherwise, move to the next step.
2. Checking for Software Updates
One of the possible reasons why your Tesla stops charging could be a software issue.
That said, you need to check if there’s a new software update available, and if there is, download and install it on your Tesla.
To check for updates, go to the Software tab on your touchscreen and tap “Check for Updates”.
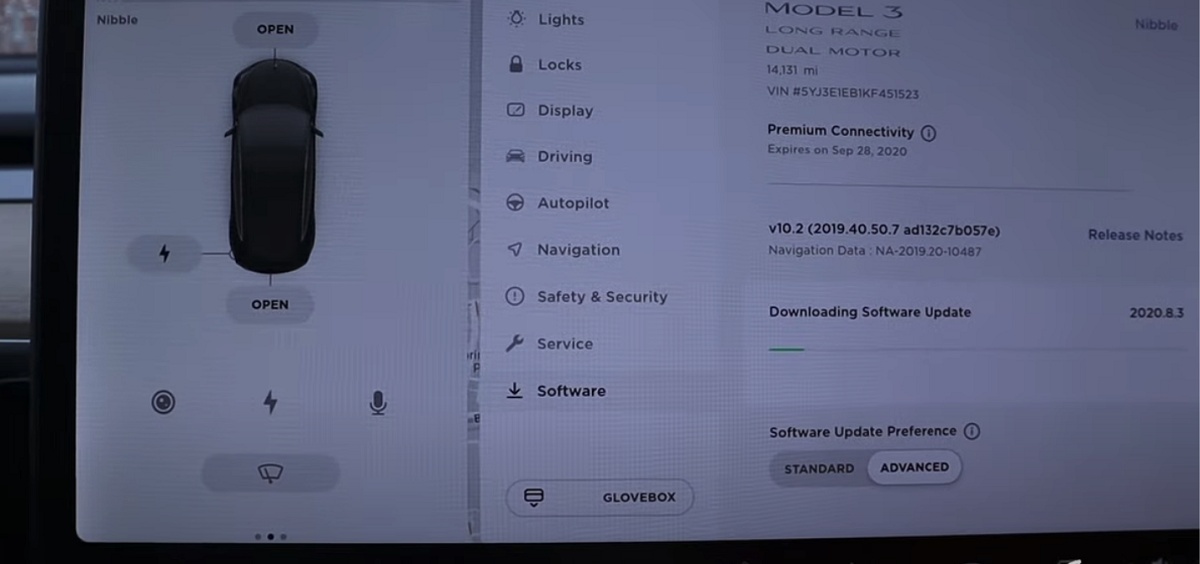
If there’s an update available, follow the on-screen instructions to install it.
3. Examine the Charger
When your Tesla stops charging after a few minutes, it’s essential to examine the charger to identify potential issues.
Depending on the type of charger you are using when your Tesla stopped charging (wall connector, supercharger or mobile connector), there are a couple of things you need to check.
Let’s take a look at the first one.
Wall Connector
The Wall Connector is the primary home charging solution for Tesla owners.
- If you’re facing charging issues, start by checking the plug and cable for any visible damage.
- Also, ensure that the Wall Connector is securely connected to the power source. Inspect the faulty adapter or charging cable as it may affect the charging process.
- For maintenance purpose, you should also periodically clean the charge port and the plug to remove debris, which may cause charging interruptions.
Also, the light status of your wall connector can give you an idea of what the issue is, as seen in the official fault codes from Tesla.
| Light Status | Issue | Solution |
|---|---|---|
| No lights | Power supply issue, charging disabled | Verify that the power supply is turned on. If the issue persists, have an electrician remove the Wall Connector from the wirebox and confirm that voltage is present at the terminal block using a multimeter. Record voltage readings:
|
| Solid red | Internal fault, charging disabled | Turn the circuit breaker off, wait 5 seconds, and turn it back on. If solid red light remains, document part number and serial number, then contact Tesla. |
| One red blink | Ground fault circuit interruption due to unsafe current path, charging disabled. | Inspect the handle, cable, Wall Connector and vehicle charge port for damage or signs of water ingress. Have an electrician check that earth ground is not directly connected to a conductor wire in the branch circuit. |
| Two red blinks | Ground assurance fault, high ground resistance detected, charging disabled. | Verify that the Wall Connector is properly grounded. The Ground connection must be bonded in the upstream power supply for proper operation. Check all physical connections, including the wirebox terminals, electrical panel(s), and junction boxes. In residential power supplies, check the bond between Ground and neutral at the main panel. If connected to a step- down transformer, contact the transformer’s manufacturer for direction on how to bond the ground connection. |
| Three red blinks | High temperature detected; charging limited or disabled | Connect Wall Connector to Wi-Fi so that firmware can update to most recent version.
Check the faceplate and cable handle for excessive warmth. Have an electrician remove the Wall Connector from the wirebox and verify that the conductors used are sized correctly and that the terminal block is torqued to specification. |
| Three red blinks, with green streaming | High temperature detected; charging is limited | Charging amperage has been reduced due to high temperatures.
Connect Wall Connector to Wi-Fi so that firmware can update to most recent version. |
| Four red blinks | Internet connection lost, online features disabled | Check for objects that could interfere with the area’s Wi-Fi signal strength. Confirm that the local Wi-Fi router is operational. If the Wi-Fi password was changed recently, follow the commissioning process on your mobile device to update the Wi-Fi settings. |
| Five red blinks | Power-sharing communication issue, charging reduced | Check for objects that could interfere with the area’s Wi-Fi signal strength. Follow the commissioning process on your mobile device to re-link the Wall Connectors for power-sharing. |
| Six red blinks | Overvoltage or poor grid quality detected, charging disabled | Verify that the power supply is nominal 200-240 volts. If the issue persists, have an electrician remove the Wall Connector from the wirebox and confirm that voltage readings are as expected at the terminal block using a multimeter. Record voltage readings:
|
| Seven red blinks | Vehicle overcurrent detected | Reduce the vehicle’s charge current setting. If the issue persists and the attached vehicle is manufactured by Tesla, record the vehicle’s VIN and approximate time of the fault and contact Tesla. If the vehicle is not manufactured by Tesla, contact the vehicle’s manufacturer. |
Source: Tesla
Supercharger
Tesla’s Supercharger network provides a fast and convenient charging solution.
- If you have issues charging at a Supercharger station, first verify the availability of the charging stall on your Tesla’s touch screen.
- Ensure that the charging connector is firmly inserted into your vehicle’s charging port.
- If you still face issues, try moving to another stall as the problem may be with the specific charger.
Mobile Connector
The Tesla Mobile Connector comes with your vehicle and offers a portable charging option.
- If you’re experiencing issues with charging through the Mobile Connector, check the connection between the charge port and charge cable.
- You should also inspect the adapter for any damage or wear as it plays a vital role in connecting the charging cable to the power source.
- Make sure the cable is uncoiled and not tangled, as this can cause issues with the charging process.
Public Charger
- When charging at a public charging station, ensure that the station is compatible with your Tesla’s charging system.
- If the charger is not a Tesla-specific one, you might need to use an appropriate J1772 adapter.
- Make sure the charging cable is securely connected to the vehicle and the station.
If you’re still having trouble, you might want to try a different charging station.
4. Delete Third-Party Apps
Some third-party apps have been associated with causing Tesla to stop charging.
These apps like the Chargepoint App, Optiwatt among others have various useful features which include allowing you to set your preferred charging limit, schedule charging to take advantage of off-peak rates, and even start or stop the charging process remotely.
They also allow you to monitor various metrics on your Tesla.
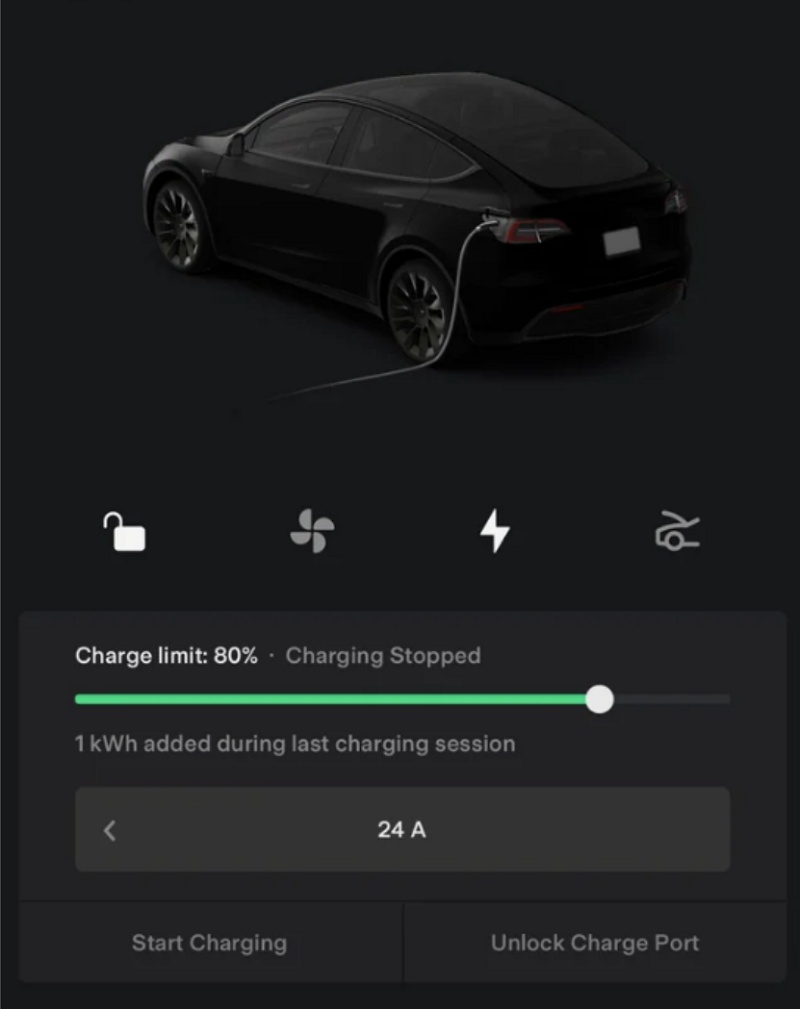
However, many Tesla owners have reported that they found these apps to be responsible for disrupting their Tesla from charging.
What you need to do is to delete any third-party app on your phone that has access to your Tesla.
Once you remove the third-party app, your Tesla should no longer stop charging unexpectedly.
5. Inspect the Vehicle’s Charge Port
If you Tesla still stops charging, the next thing you need to do is to check the vehicle’s charge port for any issue or blockage.
Here’s what you need to do:
Step 1: Unlock the Charge Port
To inspect the charge port, you need to first unlock the port.
You can do this by pressing the unlock button on your Tesla key fob, the Tesla mobile app, or via the vehicle’s touch screen.
Once unlocked, the charge port cover should easily open, allowing you to thoroughly inspect it.
Step 2: Check for Obstructions or Corrosion
With the charge port open, check for any visible obstructions such as debris, dirt, or foreign objects that may be causing your Tesla to stop charging.
Gently remove any obstructions you find, being careful not to scratch or damage the port.
Moisture and corrosion are also common causes of charging issues.
If you notice any signs of corrosion, you can gently clean the area with a dry cloth. Allow moisture to dry before attempting to charge your vehicle again.
Also, assess the overall condition of the Tesla charge port.
Look for any cracks, damage, or wear that might be preventing a secure connection between the charging cable and port.
If you discover any issues, it’s important to contact your local Tesla service center for further assistance.
Remember to be cautious when inspecting your Tesla’s charge port.
6. Update or Revert the Wall Connector Firmware
Charge session interruptions at home have also been associated with a wall connector firmware version.
This happened with a version of the wall connector firmware, in which case Tesla instructed users to revert back to the “22.41.2 firmware” version.
“We are sorry to hear you are experiencing charging session interruptions with your Tesla Wall Connector. Our teams are working on a solution at the moment. Please note that the car’s charging rate is similar to the full speed as the interruptions are short. Thank you for your patience, we are working on implementing a fix as soon as possible. We have seen this to be temporarily resolved if you revert back to a previous firmware version (attached). You can use the offline firmware update process to upload the attached file.”
With that in mind, you simply need to install the stable firmware version and install it to fix the charging interruption issue.
In some other cases, updating the wall connector firmware has also fixed the issue for some users as well.
So, go ahead and check for any new firmware version, then install it if there’s any. If there’s no new firmware version, revert to the old one for now (linked above).
7. Check for Battery Issues
Another hardware that could cause your Tesla to stop charging is the battery.
In some cases, charging issues could stem from problems with the 12V battery.
The 12V battery powers many of your Tesla’s essential components like door locks, wipers, and touch screen displays.
If you start experiencing difficulties with these systems, this could be an indication that your 12V battery needs attention.
Understanding the State of Charge of the Battery
When it comes to your Tesla’s charging, one important factor to understand is the State of Charge (SoC) of the battery.
The SoC indicates how much energy your battery currently holds, which impacts the charging process and vehicle’s overall performance.
To better comprehend your Tesla’s SoC, you can check the energy screen on your car’s center display, where you’ll see the available range and percentage of the battery charge remaining.
It’s essential to maintain a healthy battery by avoiding letting it sit at a very high or very low SoC for extended periods.
It is recommended to charge your Tesla nightly and keep the SoC between 20% and 90%.
Identifying Charging Range Issues
Another critical aspect to consider when dealing with Tesla’s charging issues is range.
The actual charging range of your Tesla may vary based on factors such as battery age, temperature, and driving conditions.
Always bear in mind that extreme temperatures can affect battery performance and charging speed.
In colder conditions, your vehicle may require more time to charge, whereas in warmer conditions, charging speed might be quicker.
In summary, it’s important to look into your Tesla’s battery to troubleshoot charging issues effectively.
Understanding the State of Charge and identifying charging range issues are essential aspects to examine when dealing with a Tesla that has stopped charging.
8. Check the Circuit Breaker
When you encounter charging issues with your Tesla, it’s important to consider electrical factors that could be affecting the charging process.
If your Tesla stops charging at home, the first thing you should do is check the circuit breaker.
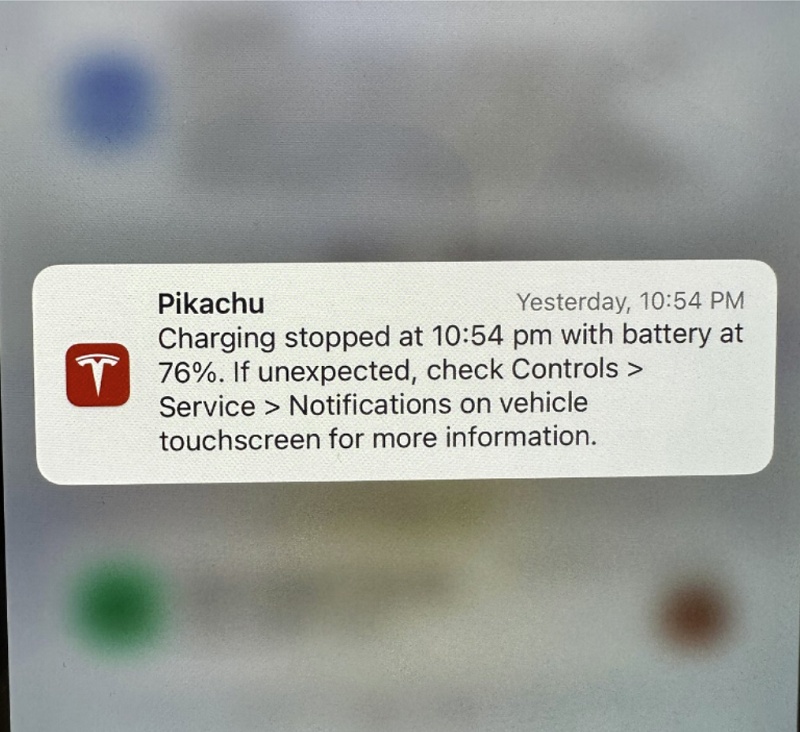
Circuit breakers can trip due to an overloaded circuit or a short circuit, interrupting the flow of electricity to your charging outlet.
To resolve this issue:
- Locate the circuit breaker panel in your home.
- Identify the breaker connected to the charging outlet.
- If it’s tripped, switch it off and then back on to reset it.
If the circuit breaker trips again shortly after resetting (or occurs very often), it’s an indication of a more serious electrical problem.
In this case, it’s best to consult a professional electrician.
9. Test the Outlet
Another common problem when a Tesla stops charging after a few minute is a faulty outlet.
Here’s how you can test the outlet for proper function:
- Unplug your Tesla charging cable from the outlet.
- Plug in another electrical device, such as a lamp or a phone charger, to test if the outlet provides power.
- If the device does not receive power, the issue may lie with the outlet or the wiring.
- If that’s the case, contact an electrician for further consultation.
10. Identify Power Outage or Overheating
Power outages and overheating are additional electrical factors that can impact your Tesla’s charging process.
If your Tesla stops charging but other electrical devices in your home are functioning correctly, a power outage affecting only the charging station could be the cause.
To check for this possibility:
- Check your utility provider’s website or contact them to inquire about any outages in your area.
- If there is an outage, wait for the power to be restored before attempting to charge your Tesla again.
Overheating can also cause charging to be interrupted.
Feel the charging cable and outlet for excessive heat.
If you notice any signs of overheating, unplug the charging cable, let it cool down, and inspect it for damage.
If there’s no visible damage, try charging your Tesla again once everything has cooled down.
If overheating persists, consult an electrician or Tesla service center for assistance.
11. Get Professional Help
If your Tesla still continues to stop charging after following the above steps, it’s essential to contact Tesla’s technical support to report the problem. They can help you diagnose the issue and provide further guidance.
Additionally, consider reaching out to roadside assistance, especially if you’re stranded and unable to charge your car.
Using Tesla’s Mobile Service:
If you’ve tried troubleshooting your Tesla’s charging issue and still cannot identify or resolve the problem, it’s time to seek professional help.
A great option is Tesla’s Mobile Service. Tesla offers a mobile service where technicians can come directly to your location to diagnose and fix any issues with your vehicle, including charging problems.
You can request this service through your Tesla app or by contacting the Tesla customer support.
Commissioning an Electrician:
In some cases, the issue may not be with your Tesla but with the charging installation itself.
In this situation, it’s best to consult a professional electrician who is experienced in working with electric vehicle charging stations.
They can help diagnose and resolve any issues related to your home or office charging setup, ensuring that you can safely and efficiently charge your Tesla.
Availing Roadside Assistance:
If you find yourself stranded on the road due to your Tesla unexpectedly stopping its charge, don’t worry – Tesla provides roadside assistance to help get you back on your journey.
To access Tesla’s roadside assistance service, you can either call their hotline or request assistance through your Tesla app.
In many cases, they can remotely diagnose the issue and, if necessary, send someone to your location to provide help or tow your vehicle to the nearest service center.
Remember, it’s important to prioritize your safety and not attempt to fix any complex charging issues on your own, especially when you’re away from a familiar environment.

